Saturday, December 29, 2012

The Art of Etiquette


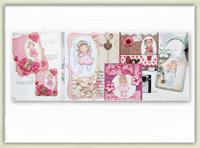
I finished 4 cards for my boys to write thank you notes to their God parents.  Since I homeschool them, I can use this for their school and that gives them incentive to write nicely. You know how boys are with pencils in their hands, "oh, I can't write that much","oh, my fingers hurt", "when is this over"....you get what I mean.  2 are Magnolia cards colored in Copics and 2 are basic cards using a chalkboard technique that I have been seeing lately.  I found the best tutorial at Betsy's blog here.


I just love Edwin sitting on the sleigh looking at the long list of wants.  I put my kids name on the list to personalize it.  The paper is Memory Keeper "Winter Frost" and the metal charm near the bow is also from that set.  It comes with a page of tags and little spaces to write to I chose a few of those to use on this card.


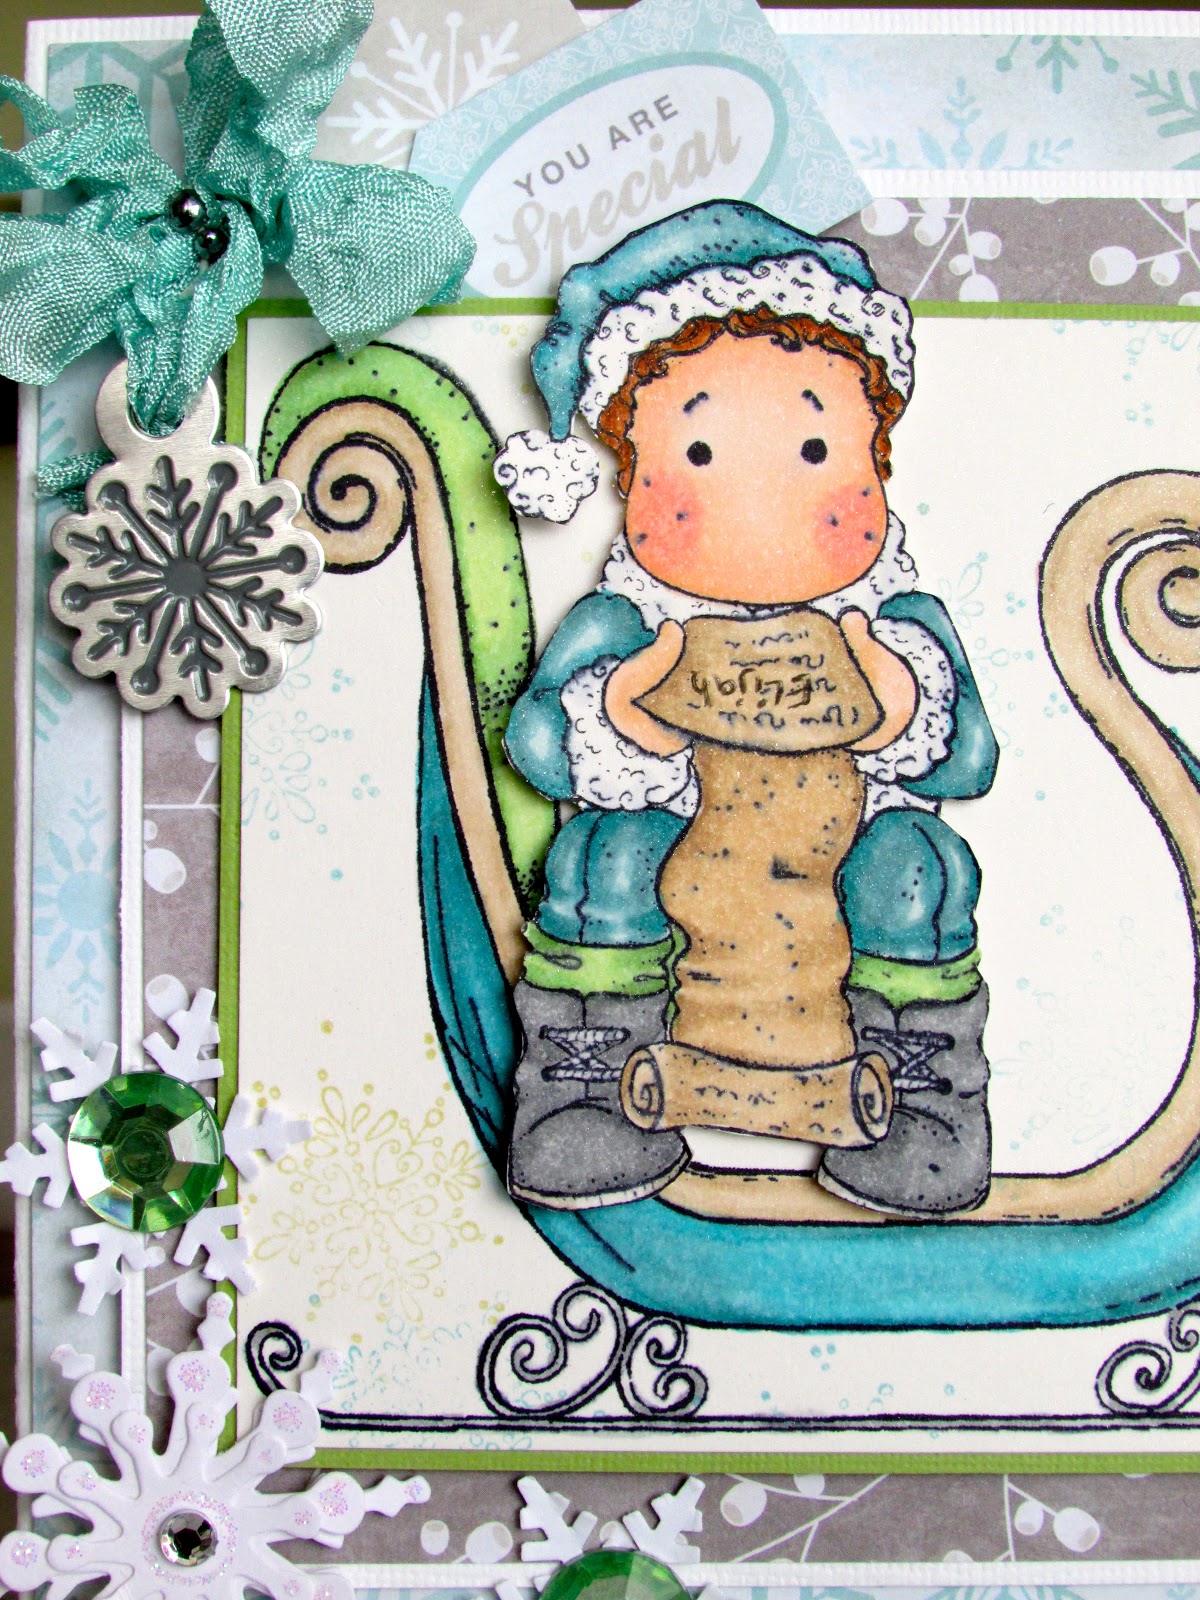
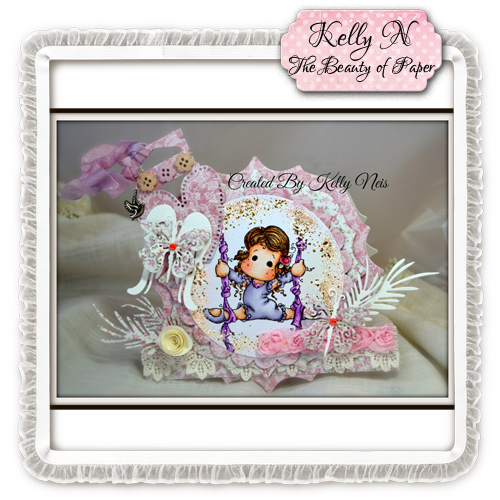
Here is a different view where you can see the embellishments more


The inside is uses the same paper and a writing space, I love how it coordinates.


I made 2 of this card with the ideas that I have seen from the Chalkboard look.  The sentiment is from Papertrey Ink and made a nice chalkboard look for me.  I received some nice Candy's in the mail from recent winnings and incorporated them on this card and the next.  Fun surprises, Thanks Janiel


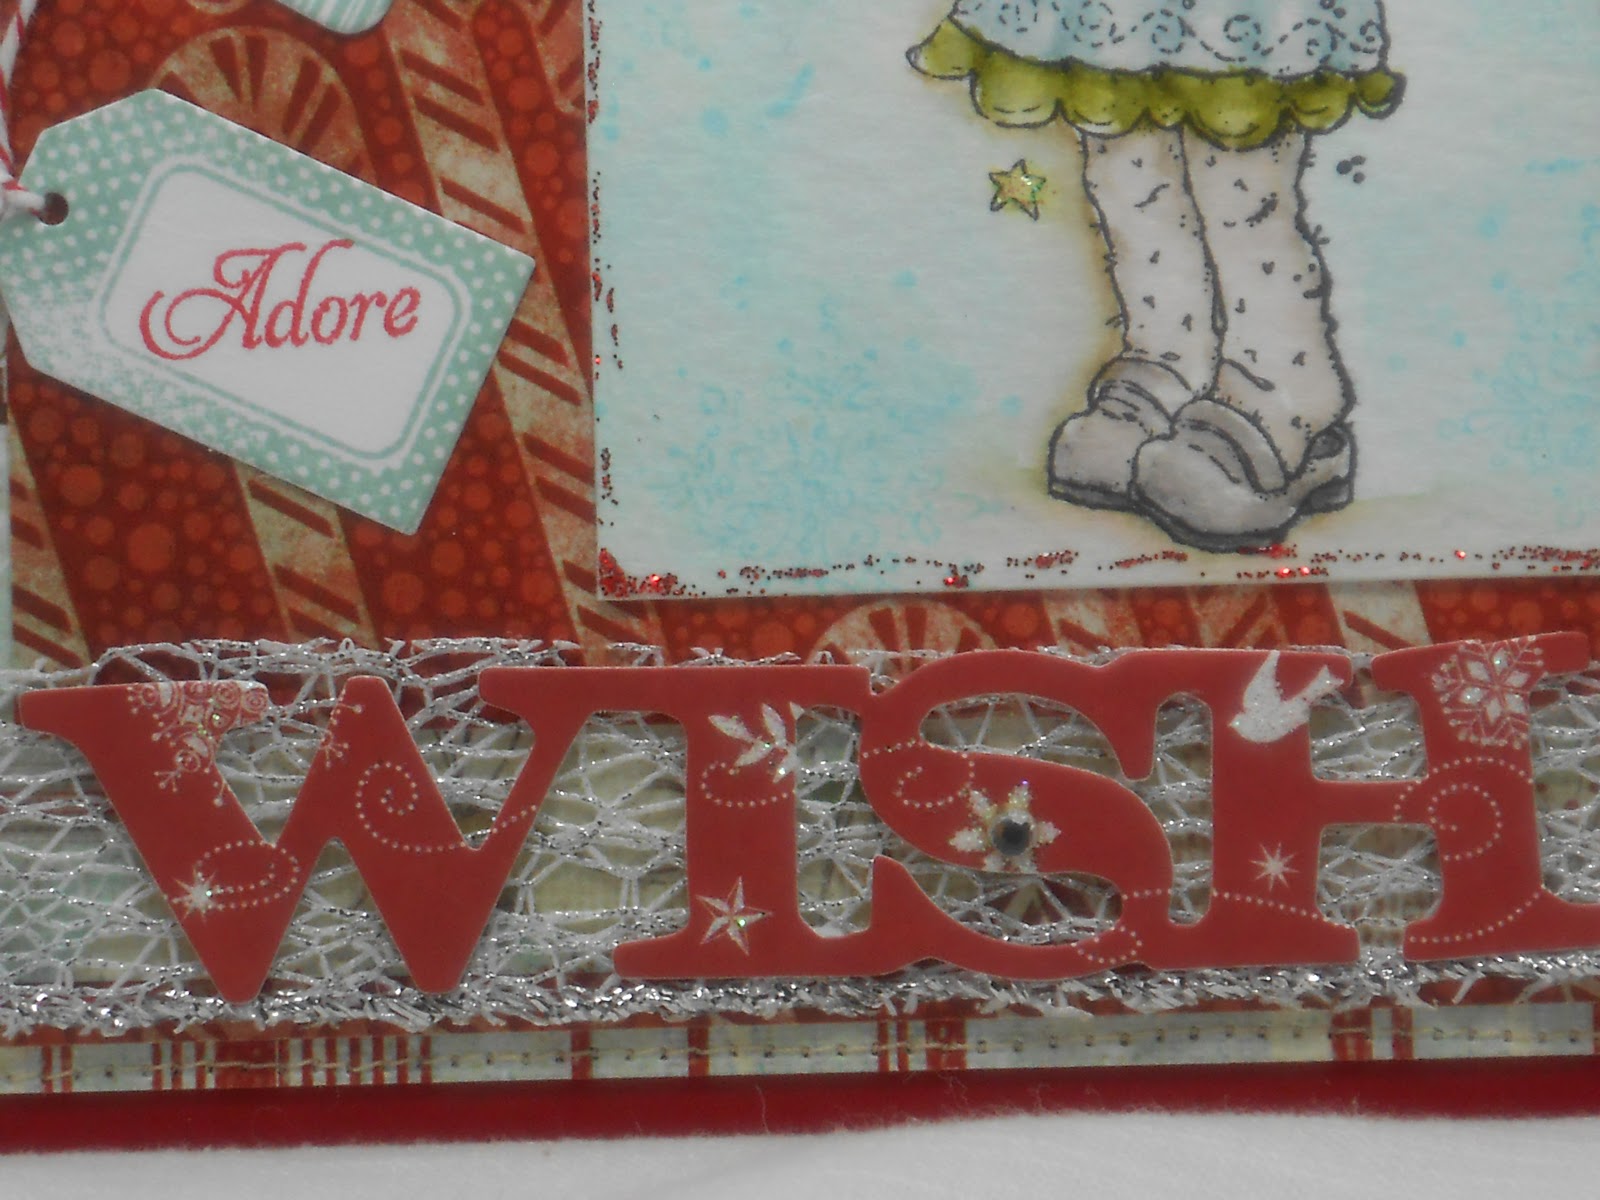
Another card with Edwin on the sleigh using Echo Park paper "Very Merry Christmas".  I tore the bottom and inked it for texture on the card then I place the ribbon over it.  The shiny stars dangle from the side.  Once again I have another childs name on the list, this list could have been miles long! lol


My Hubby gave me a new camera and I am trying to figure out how to use it, I hate reading instructions but some of the photos are better than others.  I cannot justify the nicer DSLR camera's as I break them with in a year, I do not know why,  just happens.  This camera is a step down from the entry level DSLR.  I am hoping for a longer life as well as clearer photo's on this camera.


The inside of the the card.  I did the chalkboard sentiment on the left and a poinsettia in the corner on the right.


Here is the close up of the Chalkboard look
Black paper and SU craft white ink, sponge lightly the edges, simple.  Betsy show's you how to step it up a bit and create a more ornate one.


I hope you enjoyed your Christmas holiday with family and now looking forward to New Years and all that is yet to come. Wishing you happiness and good health to all. 
Happy New Year!!
Kelly

Sunday, December 23, 2012

Christmas Tag


We are so close to all the festivities with family and the celebration of the Birth of Jesus!

Looking back this past year I am very grateful for you, my blogger friends and I adore your creations!
Thank you for giving me encouraging comments and enjoying my work.  I have made awesome friends here and I want to wish you all a very Merry Christmas with your families!


I made a tag for a gift we are delivering this afternoon.  I used MME Lost and Found Christmas papers for the tag, the TH Holly die cuts and the Magnolia Doohickey tag die on top. 


The top is a crinkled ribbon with burlap and a rustic bell tied onto the Magnolia Doohickey die.  Then I used wooden snowflakes after inking them a bit.  A gold pearl is in the center of them.


Under the WOC rose is a TH pin where I cut out the Merry & Bright from a piece of MME paper.  I put it on top of the TH Holly leaves die cut and added more burlap ribbon strings. Across the bottom of the tag is a burlap ribbon.


Tilda is colored in Copics
Dress R39, R59, R89
Socks and trim E41, E42, E43, E44
Skin  E00, E01, E21, R20
Hair  E 53, E55, E59
I stamped a Magnolia snowflake around her and then lightly edged her oval with SU Sahara Sand.
Her wings and stars have a bit of stickles on them.


I would like to enter this tag into the following challenges

Have a Very Joyful Holiday!!!
Kelly

Wednesday, December 19, 2012

Dress Form on Canvas

Hello Blog Friends,

Just playing around on a smaller 10x10 canvas, I created this piece of art.  I squirted small amounts of Decor Art dazzling  metallic glaze in luminous gold around the canvas and then used a flat brush to make the swirls.  While it was wet I sprinkled Stampendous Frantage tea stained fragments onto the edges of the swirls.  After the project was completely done I needed to glue more of the fragments on to fill it in where needed.


 I made the dress form base and then the honey comb corset part with Tim Holtz (TH) sewing room die. Then I cut tissue paper with TH layered wings die. The wings and the honeycomb corset were lightly edged using my finger with  TH distressed stain in brushed pewter. Then I cut my 100 year old crocheted lace from my mother-in-law's  mom.


I attached prima buttons onto the corners over the crocheted lace.
  On the honeycomb dress form I put a Webster's Pages piece of ribbon and at the bottom is TH pewter crown.  Underneath the dress form is film strip ribbon from TH also.  I tacked the middle down with a brad and then left the rest to curl up.  The wings were slightly glued down first and curled up the edges a bit.  Then I attached the film strip, dress form over that and added the crown.


I received this 1 photo over email so it is not the clearest but this is my 93 year old grandmother and my new grandfather who is 94 after their wedding.  She has never worn a expensive dress before and my Aunt provided her pearls and did her makeup. George is very happy and grandma Vi is probably telling someone what to do. lol   She is so cute!


I hope you enjoyed my project and I encourage you to experiment as well, 
Happy Holidays to everyone!

Kelly

Saturday, December 15, 2012

Red Christmas Card

I have another card that I made and waited for my friend to send me poinettia's.  I never purchased a die and then my friend said she would make them and send them off for me.  How sweet is that!
Then I won two candy's last weekend and not to boast too much another sweet friend Cathy Lynn sent me some gorgeous ornaments she made, they are at the bottom of this post.


I found a new 6x6 pad from Theresa Collins and had to make a card with it.  I colored Tilda with Copics and lined her oval with gold beads.  I added some glitter to highlight.


A Cheery Lynn Die and those poinsettia's from my friend helped balance the card.  The middle sentiment is from the paper pad and I cut it out.  The poinsettia's are glittered on the edges.


The inside is a another sentiment I cut out from the pad and little snippets of the paper pad so I thought it would be festive to use.


mmmmmm


Nothing like running Santa's Christmas Train.


Now look at these 2 hand made ornaments from Cathy lynn.  I did not expect to see these in the mail.  Thanks country sista!


I hope all your Christmas endeavors are going well, I have alot of cards to make and then get them in the mail yet.  
Ho Ho Ho
Kelly

Christmas Hala

I finally went Christmas shopping one day and I only have 3 presents left to go. Not to bad for being behind.  I have a couple of post's with cards and some fun photos for you.


I just had to color her up quick as she is so fun to create with.  Around the circle she is on I drizzled glue and then put glitter on it, let it dry, so it is raised.


I colored her with Copics and doodled around her with a multi-liner  .05. 


Frosty Pug


My own Magnolia tree covered in snow


This is one day of snow, we figured about a foot.


Thanks for stopping by and I hope you enjoyed the photos.
Kelly

Tuesday, December 11, 2012

Love Inspiring

Here is a story you will love....
My grandmother is 93 years old, round, roly poly, fun, happy lady that all this kids flock to.  Her whole life she lived in poverty, was taken care of by her children or living with other ladies.  She was married before though her circumstances have never changed.  Despite that she has always been a positive, cheerful and a Godly person.  A role model for others.  

In one week, she will be getting MARRIED to a 94 year old man who loves her for who she is, her raisen pies and her hand made dresses.  He is a well dressed man who still own's his own business.  He has a maid and eats out every day while still making sure his friends are taken care of.  They have been officially courting each other for the past 5 months with chaperones. 

 Last week he popped the question and the next day bought her a real diamond ring, first one she has ever wore.  He is taking her to Hawaii for a 2 week honeymoon!  She is so giddy like a school girl.  He told her when he dies she will never have to worry about finances again!  

How sweet is this!!!!  I am so happy for my grandmother, she deserves peace and happiness in her life, finally!  I had to share this with you, it gives us all HOPE.


To celebrate their occasion, I made them this card with Mo Manning Senior images.  They are colored in Copics.  I used a Cherry Lynn die for the base and a memory box die for the gate.


They walk hand in had so I can picture them in these two images.  This is the front of their card.


I made a easel card for them and this is the inside base.  My easel photo is missing, I am having computer issues in regards to my photo card so sorry about that.


They are having a private wedding in his home and his son-in-law will be the officiant and my Aunt and Uncle will also be there.  Very quiet and personal like they want.  My grandma is wearing a gorgeous pink dress she has owned for about 20 years.  She never changes.  I wish I could go but they live many States away.

I hope you were inspired by my story today and enjoyed my card.  
Have a wonderful day!
Kelly

Friday, December 7, 2012

Holy Tilda With Violin Tag

Good Morning!
I made another tag for my small tree.  I need to get more done as Christmas is coming soon and I haven't done ANYTHING!  Nope, no shopping, decorating, no tree, no menu, so I need to get into high gear and create!


I colored Tilda in Copics and Glittered a chipboard frame.  Then made the base tag from Tim Holtz  Tag and Bookplate die.  


I embellished the bottom with Tim Holtz tattered pinecones and florals that I had.
The DP is TPC Studio  Woodland Winter.

Thank you for stopping by and leaving your love!
Hope you have a great weekend, friends!
Kelly

Wednesday, December 5, 2012

a Die for a Sketch Challenge 7

Hello my friends and welcome to my first DT post for 

I am so proud to be a new designer there and to work with very talented ladies.  You can visit my new design teammates, I have listed them on the side of my blog.

To enter the Challenge over at a Die for a Sketch Challenge Blog just go HERE and follow the directions.   Follow their monthly sketch and use 1 die on your creation.

Here is the Sketch for December 


Our wonderful sponsor this month is Bugaboo Digi Stamps  They will be giving the winner of this challenge 7 fabulous digi stamps!!

Here is my card I created for the DT position at a Die for a Sketch


I colored Tilda with Distressed Inks and used Fancy Pants Design papers "Christmas Magic"


The die cuts I used are Papertrey Ink Tiny Tags die and Die Versions Heart Burst die


My friend gave me a mesh ribbon so I  put a die cut from Fancy Pants on it, so cute. 


Thank you so much for stopping by today!  I hope you go to a Die for a Sketch Challenge Blog and enter to win those 7 digi stamps from Bugaboo Stamps!!

Have a great Day!
Kelly

Tuesday, December 4, 2012

HAPPY NEWS, HAPPY NEWS

Guess What?

I have been chosen to design for 
Challenge Blog!!!

I was looking at my e-mails early this morning and realized I need to make a card for my first challenge!   Then set up my blog!  Go get groceries!  Ect....

I am very thrilled and I am sure you will enjoy participating in their challenges too every month.
Tomorrow will be our Challenge for December so I will have my first DT card for you all in the morning!  Be sure to stop by and check out the DT people, they all have gorgeous work.  They are listed in my side bar with the links to their blogs.

Thank you all for the encouragement you give me on my creations, I appreciate you all.

Kelly

Monday, December 3, 2012

2 Tags For Christmas Tree

I have put 2 tags on this post today for Challenges

In my bedroom I have a small Christmas tree that I usually decorate in natural colors and things.  I am making my own tags this year for the tree.

This is the base template I used kraft card stock and then put craft paper which is thinner like a paper bag onto the base.  The top has tissue paper on it.  The kraft paper was crunched up and then laid out and lightly inked with Brushed Corduroy.

Here is a close up of the Kraft paper.  Under the paper I used Tim Hotz's tape, it is printed with images and words and is like masking tape, I just pleated it and made a edge all around the star.

Here is the tag finished

Tilda is colored with Distressed Inks and I used cheesecloth from my apple cider herb blend, perfect color, to put underneath her.  I sprinkled snow and wooden snowflakes around.

Close up of the tissue paper top tag area, I scrunched tissue paper and glued it on.  To the left the cheesecloth had a natural rolled curve that I thought made it look like a sack so I tied it with Jute and a bow.  I stickled the word wish just a bit. 

Here is Tilda up close, she is one of my favorites

You can see the dimension of the tag


Here is a metallic tag using Tim Holtz Distressed Metalic Stains. I Distressed Inked Tilda a small amount of stickle and taped her onto a metal rusty heart.  The background has a black embossed set of Angel Wings and then liquid pearls all around.  The black edges are cut from Tim Holtz vintage lace die.  I embossed a wooden snowflake and star on here too.

The Merry Christmas sign is stamped and embossed with clear embossing powder and then I smeared the Metalic stain onto it and wiped off for a vintage look.  This tag in interactive although it is hard to see but Tilda on the heart moves, shakes as I made a spiral piece from floral wire and attached it to both ends.  It works and makes her move.

My first tag I would like to enter into the following challenge


The 2nd tag I would like to enter in the following challenge

I hope you all have a wonderful day!
Kelly